As you walk the path to becoming an ethical hacker, you begin realize that one of the greatest skills in this profession is your ability to learn and adapt to new tools and technologies. Recently, I found that I was getting tired of having to work off of virtual machines to do basic tasks in Linux. The VM image I was using took too long to boot, I was experiencing poor performance, and it was becoming tedious how often I spent doing resource allocation. Enter Windows Subsystems for Linux, a game-changing feature that bridges the gap between Windows and Linux.
What is WSL?
Windows Subsystems for Linux, often abbreviated as WSL, is a feature that allows you to run Linux programs natively on your Windows machine. It’s a lightweight, integrated subprocess on all Windows machines from Windows Server 2016 and onwards. There are two versions of WSL: WSL 1, which implements a Windows kernel, and WSL2, which uses the Hyper-V architecture with a Linux kernel. By default, your installed version will be WSL 2 with Ubuntu. However, you can use all sorts of distributions with WSL, including Kali Linux.
![]()
What’s the difference between WSL 2 and a VM?
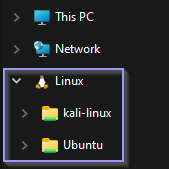
While both technologies allow you to run Linux via virtualization, there are certainly some key differences to take note of. First, the Linux kernel used by WSL 2 was designed by Microsoft specifically for WSL implementation. It was made so that the Hyper-V toolset required to boot the kernel utilized very minimal resources, which in turn is what allows WSL 2 to boot in a matter of seconds when launched. Traditional virtual machines require separate software used to boot the VM and for the user to appropriately allocate their desired resources to that VM’s instance, which plays part in a virtual machine taking longer to boot when launched. File management is relatively straightforward as well with WSL 2. When you first run WSL 2, it will create a separate directory in file manager for each of your Linux distributions. With VMs, you either have to store your files locally to that machine or set up a shared file system between the VM on your host OS, which speaking from experience, can be trickier than you’d expect.
Lastly, one of the best aspects of WSL 2 is that updates are managed by Microsoft. If you downloaded WSL through the Microsoft Store, updating it is as simple selecting “Get Updates” in your library and letting it run. On the other hand when you download a VM image, that’s the version you’re getting. In order to use a more up-to-date version, you will have to navigate to the distribution page for the OS you’re installing and get the version you’re looking for.
All of the reasons above are exactly why I love using WSL 2. It allows me to set up a SOCKS connection to a dropbox on a client’s site and use Linux CLI all on my native Windows host without dealing with the long boot times I experienced using a traditional virtual machine.
Sounds like WSL 2 is just better, right?
Well, not necessarily. The truth is, both are great in their own respect and can be used in a multitude of contexts. Virtual machines are great for setting up servers or lab environments, and offer ease of use when it comes to graphical interfaces. In general, you’re going to have more control over management with the different machines on your VM software and customize them entirely to your liking. WSL 2 is very beginner friendly and is a quick way to start getting familiar with Linux without the hassle of setting up a VM.
With that being said, one of the quirks that I experienced when initially using WSL 2 was that I had issues proxying web traffic to BurpSuite. Long story short, I discovered that Windows sets ups a Hyper-V firewall on your Ethernet to vEthernet adapter. I will be showcasing my solution to this problem and allow you to get started using WSL 2 for your web testing.
Proxying web traffic through BurpSuite
Figure 1. SOCKS connection to Internet

Figure 2. Proxying web traffic to BurpSuite
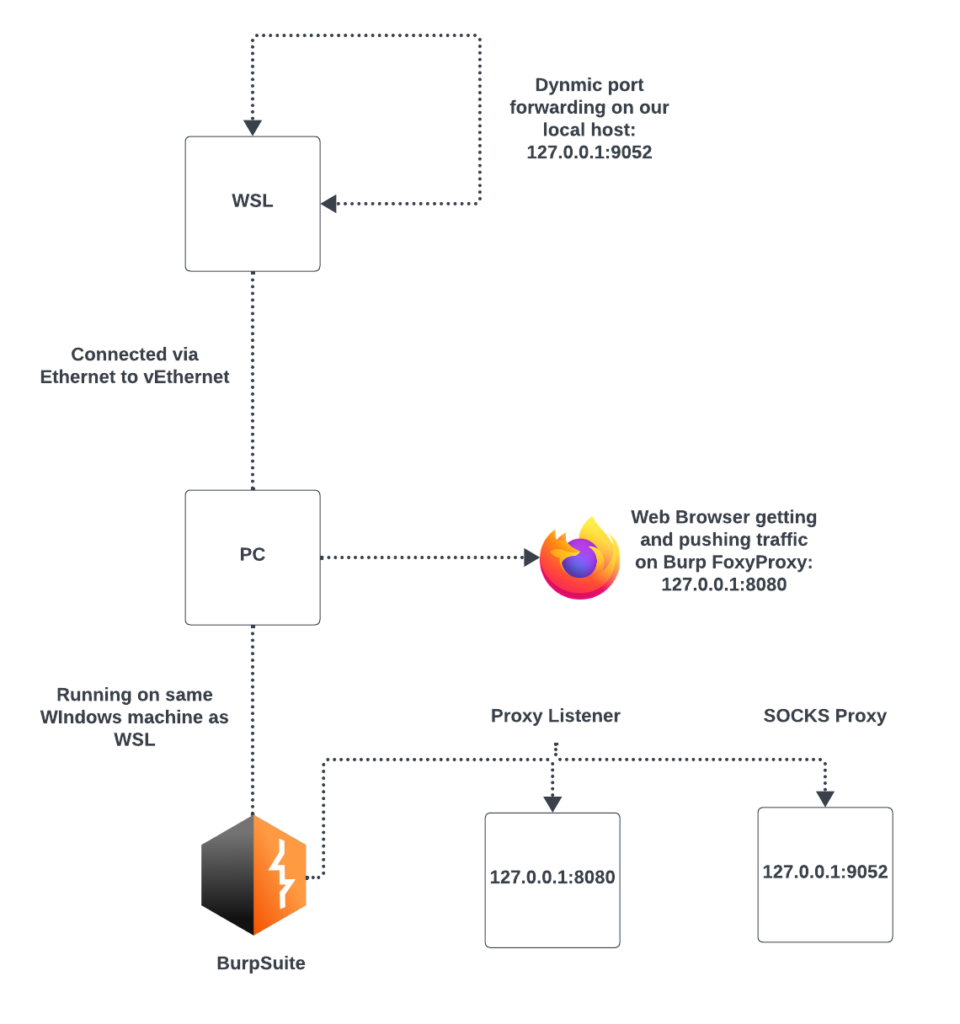
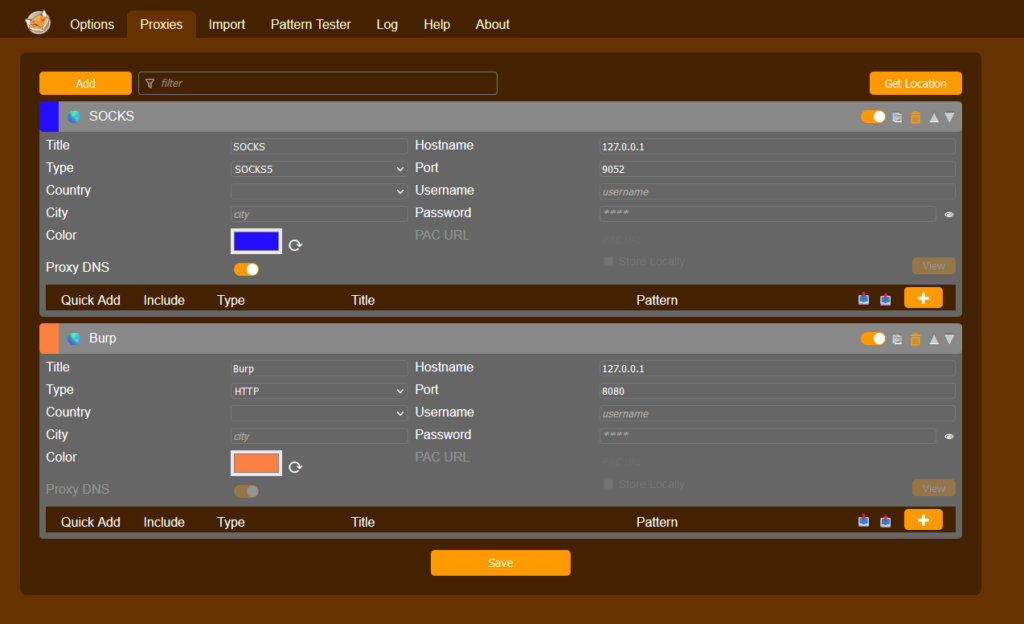
Utilizing Firefox, make sure you have the FoxyProxy extension installed. (Chromium within BurpSuite is an option if you do not want to use Firefox and the end solution should work the same.) Next you’ll want to set up two different proxy configurations, a SOCKS5 (named SOCKS) connection and an HTTP connection (named Burp). The SOCKS protocol facilitates a network connection between the client and the server, which in today’s demonstration will both be our local host. Essentially, it sets up a tunnel for the traffic to be channeled to the desired endpoint.
Next, start your SSH service in WSL 2. You can do this by running the following:
sudo service ssh start
Connect to your local host via ssh. To signify dynamical port forwarding, we’ll be use the -D flag with our local host (127.0.0.1) to whatever port you set your SOCKS connection to (in my case, I set it to 9052):
ssh localhost -D 127.0.0.1:{SOCKS port}
Now open up BurpSuite and navigate to the settings tab. Under Tools>Proxy, check to see if you have a proxy listener set up. Burp typically creates this listener by default, but if it’s not there you can quickly set one up using the same port and hostname as you set up in FoxyProxy.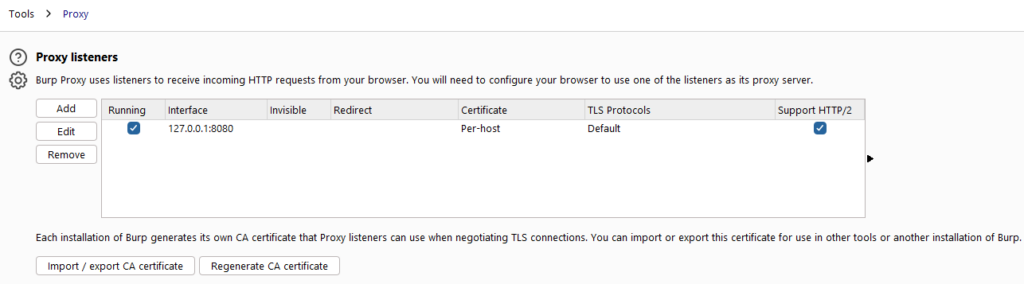
Then navigate to the Network>Connections tab and scroll to the bottom, where you should see a SOCKS proxy section. These settings ensure that outbound requests from your web browser are being received by Burp. Set this proxy up with the same settings as you did in FoxyProxy.

Finally, turn on your Burp FoxyProxy and navigate to the web page you want.
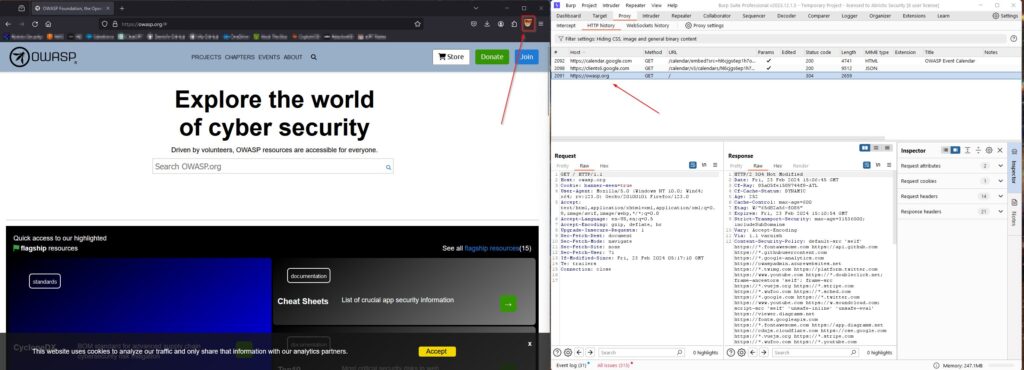
Congratulations, you have successfully learned how to proxy web traffic to BurpSuite using WSL 2!
Whether you’re a beginner looking for an easy way to start using Linux or a seasoned penetration tester that’s looking for new ways to test, check out Windows Subsystems for Linux and see if it’s right for you.