If you’ve spent any time in the physical hacking tool space, you’re probably familiar with the usual suspects: WiFi Pineapples for deauthentication attacks, USB Rubber Duckies for payload delivery, and badge cloners for RFID shenanigans. These are all great tools, but today I want to talk about another category, the gachi category.
The gachi category is simple: AI-based hacking tools installed on a Raspberry Pi Zero that perform attacks automatically and a little character on screen. The two tools I’m covering today are Pwnagotchi and Bjorn.
Here are the links to install the Pwnagotchi and Bjorn
- Pwnagotchi – https://github.com/evilsocket/pwnagotchi (Note: This is the official repository, however due to display compatibility issues we’ll be using a community fork, linked later in the post)
- Bjorn – https://github.com/infinition/Bjorn
Pwnagotchi: The WiFi Handshake Hunter
What Is It?
Created by Simon “evilsocket” Margaritelli, Pwnagotchi is a small, battery-powered device that uses a reinforcement learning algorithm called Advantage Actor-Critic (A2C) to autonomously capture WiFi handshakes. Don’t worry too much about the deep learning theory, the short version is that A2C is a reinforcement learning model that helps Pwnagotchi make smart decisions about which access points and clients to target, learning over time to maximize the number of handshakes it captures.
The actual heavy lifting on the WiFi side is done by Bettercap, a powerful software framework for monitoring and injecting WiFi packets. Pwnagotchi’s A2C brain sits on top of Bettercap, rewarding itself when it successfully captures handshakes and gradually refining its strategy without any human guidance.
You can disable the AI entirely if you want consistent, predictable behavior for example, if you already know the optimal settings for a given environment and don’t want the device burning CPU cycles experimenting. With the AI off, it simply follows your preconfigured settings and passively captures handshakes or sends deauth frames on command.
My Hardware Setup
- Raspberry Pi Zero 2 WH
- Waveshare 2.13″ E-Ink Display HAT v4
Installation
Installing Pwnagotchi is conceptually straightforward: download the zip from GitHub, configure your config.toml, flash it to a microSD card, slot it into the Pi, and power on. In the config, I set the device name, language, and importantly a whitelist and exclude list of SSIDs I don’t want the device touching. Simple.
Except it wasn’t, because of the display.
The official Pwnagotchi compatibility list supports Waveshare v1, v2, and v3. I have a v4. The v4 is supposedly backwards compatible with v3, so in theory chainging the ui.display.type to waveshare_v3 in the config, it should work should work. However, it did not work for me.
Rather than buying a v3 (I refuse to spend money I don’t have), I went digging and found that the community had already solved this. The official repository has known issues with the v4 display, so a community fork exists with the necessary fixes baked in. Here is the Github if anyone has this issue: https://github.com/aluminum-ice/pwnagotchi Flashing from that fork and the little guy booted right up.
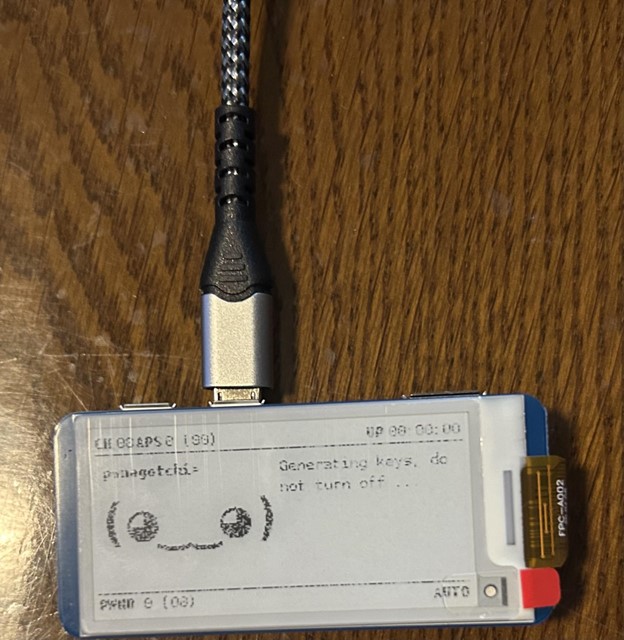
One important note: when Pwnagotchi first starts up, it generates SSH keys. Do not power it off during this process. Interrupting it corrupts the installation and you’ll be starting from scratch. And if you do everything right, then you should get your very own Pwnagotchi
Once it’s done, you can install the USB drivers, configure a static IP, and SSH in normally.
How It Actually Works
To understand what Pwnagotchi is doing, you need a basic understanding of the WPA/WPA2 4-Way Handshake. When a device connects to a WiFi network, both sides exchange four packets that negotiate the session encryption keys. This handshake is what Pwnagotchi is after.
It collects handshakes in two ways. Passively, it sits on a channel and waits for devices to naturally reconnect, like when someone first walks into the office for the day and connects to an AP. Actively, when it detects a client connected to an access point, it can send a deauthentication frame to boot that client off the network. The client immediately tries to reconnect, repeating the handshake in the process, and Pwnagotchi snags it.
All captured handshakes are saved as PCAP files on the device. Transfer them off, run them through hashcat or aircrack-ng, and you have a shot at cracking the network password offline.
Results
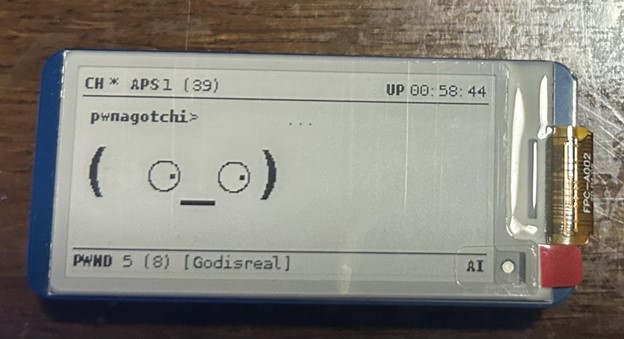
I did a little wardriving and let Pwnagotchi run for an hour in my area and came back to 8 captured handshakes from several different networks. The PCAP files were waiting for me after a quick SSH session, ready to be analyzed in Wireshark or fed into a cracking tool.
Bjorn: The Network Recon Viking
What Is It?
Created by infinition, Bjorn is the second member of the gachi family. Where Pwnagotchi hunts WiFi handshakes, Bjorn is focused on local network reconnaissance and exploitation. Think of it as a Tamagotchi for network attacks, once you plug it in, it starts working.
Bjorn scans the local IP range, identifies live hosts, enumerates open ports and services, and then automatically launches attack modules against what it finds. It uses Nmap under the hood for discovery and vulnerability detection, and has built-in modules for brute-forcing SSH, FTP, SMB, RDP, Telnet, and SQL logins. It can also extract files from misconfigured services and store them locally for review, all without you typing a single command.
Installation
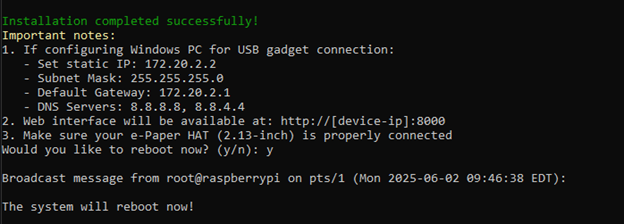
Unlike Pwnagotchi, Bjorn’s setup is simple. Using the same hardware (Raspberry Pi Zero 2 WH and Waveshare v4), you flash Raspberry Pi OS Lite 64-bit to the microSD. GitHub recommends the 32-bit version, but I ran the 64-bit version without any issues.
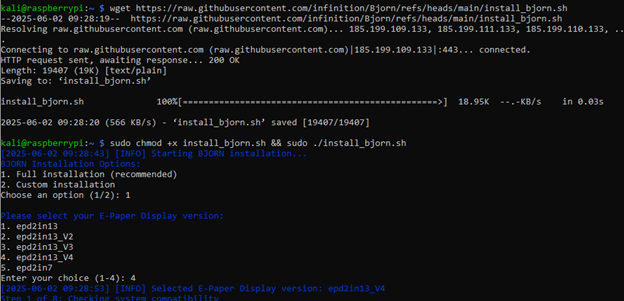
From there, SSH into the Pi, run a wget to grab the Bjorn installer script, and execute it. Bjorn’s installer will asks what kind of installation you want (full installation for me) and even asks which version of the Waveshare display you’re using. It handles the rest.
The Display
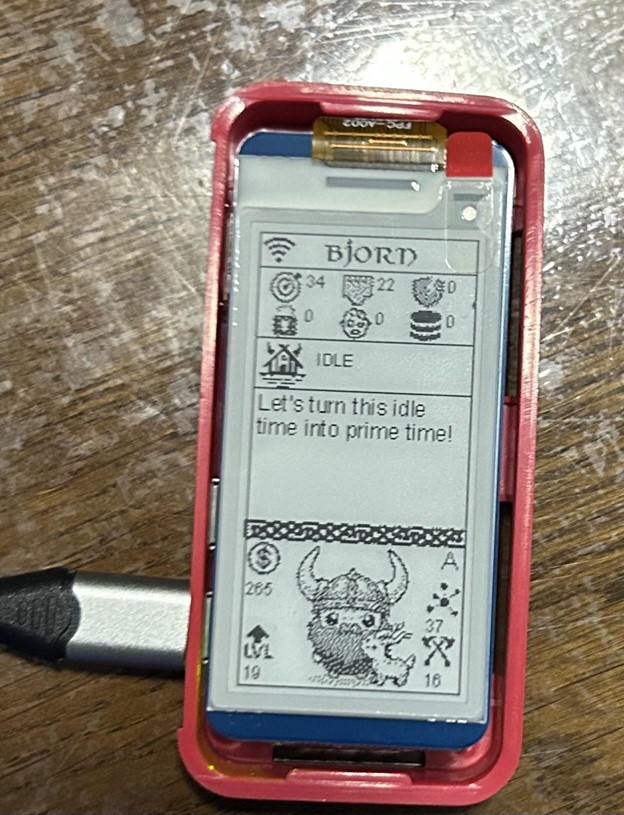
Once running, Bjorn shows his stats right on the E-Ink screen with a set of icons:
- Target icon — number of IPs detected on the network (Bjorn found 34 on mine)
- Paper icon — number of open ports discovered
- Broken shield — number of vulnerabilities found
- Lock icon — total credentials cracked
- Zombie icon — number of machines with established persistence
- Pancakes — number of files exfiltrated
He also shows his current activity (e.g., running an Nmap scan against a specific host, finding an open SSH port), along with RPG-style stats: virtual currency accumulated, current level, total known hosts, and attack counts.
The Web UI
This is where Bjorn really shines over Pwnagotchi. Rather than just SSHing in to pull files, Bjorn has a full web-based UI for reviewing results.
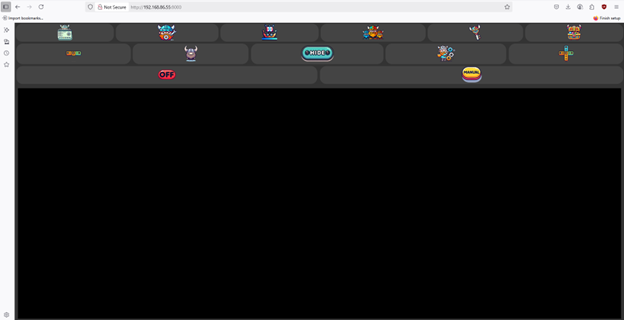
The key sections are:
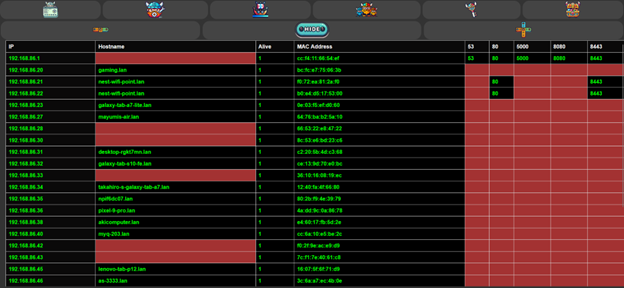
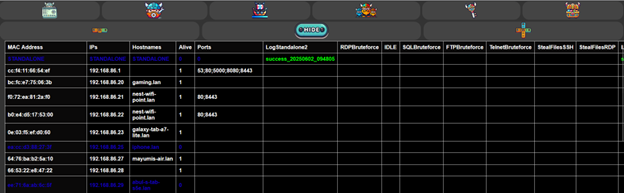
Network — A CSV-style view of discovered devices, showing IP addresses, MAC addresses, open ports, and hostnames where available. Great for a quick overview of what’s on the network.
NETKB (Network Knowledge Base) — Bjorn’s memory. Every host discovered during scanning gets logged here, with action results updated in real time. The orchestrator tracks whether attacks succeeded or failed and uses that to determine whether to retry or skip certain hosts.
Credentials — All cracked credentials in one place. Any passwords recovered through brute-force attacks show up here, and these credentials then feed into Bjorn’s data-exfiltration modules automatically.
Loot — Where stolen files live, organized by filename pattern or extension as configured. Files are prefixed with the source MAC address to avoid ambiguity when the same IP appears across different networks.

My home network didn’t yield any credentials or loot, nothing vulnerable to expose, fortunately, but the network map and port data alone were interesting to look at from an inventory perspective.
Conclusion:
Both Pwnagotchi and Bjorn are great beginner projects if you are looking to get hands-on experience with automated network security tools. However, these are not toys. Pwnagotchi captures real WPA and WPA2 handshakes that can be cracked offline, and Bjorn performs real brute-force attacks against live services while actively attempting to exfiltrate data from vulnerable systems.
Be sure to use them in your own lab and test only against networks you own or have explicit permission to assess. The builds are fun and the learning is real, but always make sure you are on the right side of the law before letting your digital monsters loose.