Why and What
Setting up a homelab can feel overwhelming at first. With an abundance of guides, opinions, and technical information available, taking the initial step may seem challenging. However, the long-term benefits far outweigh any perceived drawbacks. A well-designed homelab provides a safe, controlled environment to develop and refine your information technology and cybersecurity skills, experiment with new tools, and learn from mistakes without impacting production systems.
Why Build a HomeLab?
- Skill Development & Certification Readiness
- Gain hands-on experience with IT system setup, configuration, and troubleshooting.
- Practice scenarios aligned with industry certifications.
- Safe & Controlled Experimentation
- Build isolated, intentionally vulnerable environments for security testing and exploit research.
- Test configurations and software without risking production systems.
- Self-Hosted Services & Custom Projects
- Deploy personal services such as file sharing, media servers, and automation integrations.
- Explore advanced setups like virtualization clusters or container orchestration.
- Cost Efficiency
- Make a one-time hardware investment instead of recurring cloud service fees.
- Maintain full control over your infrastructure and data.
Choosing the Right Refurbished Server
- Start with a Budget
- Determine your spending limits before making hardware decisions.
- Consider using an existing system, purchasing new components, or opting for refurbished enterprise servers.
- Sourcing & Warranty Considerations
- Research reputable vendors, online marketplaces, and local resellers.
- Evaluate warranty options for peace of mind, especially with refurbished equipment.
- Maximizing Performance Within Budget
- Balance system age with processing power, memory capacity, and upgrade potential.
- Avoid overspending on features you don’t need for your current goals.
- Physical Location & Noise Management
- Enterprise-grade servers can be noisy; plan where the system will reside.
- Suitable options include a dedicated closet, home office, or storage space with adequate ventilation.
Decision:
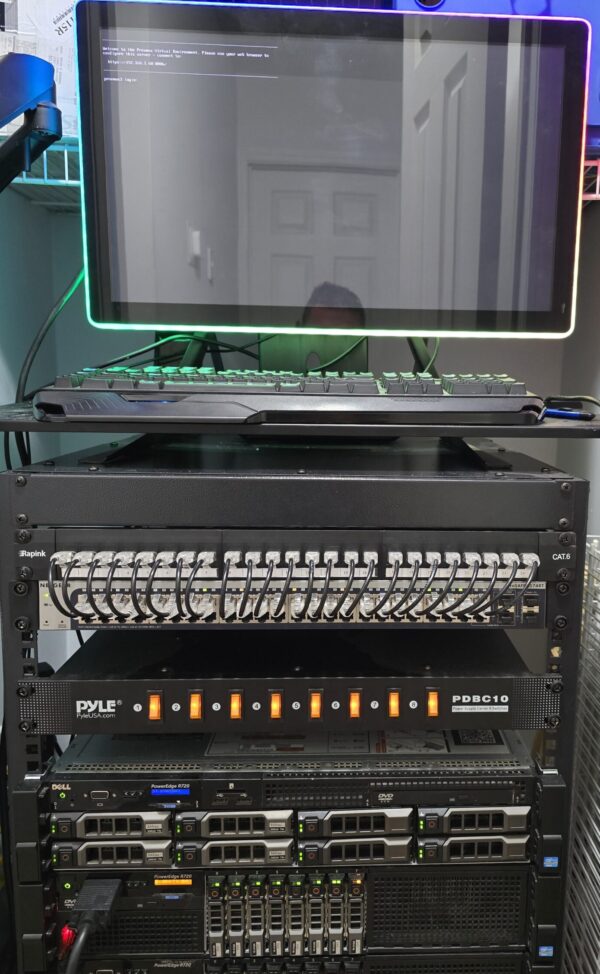
In 2024, I acquired a Dell PowerEdge R720 equipped with dual Intel Xeon E5-2640 processors (2.50 GHz), 128 GB DDR4-1333 MHz memory, and dual 750 W power supplies for $162.00. After adding storage drives, a rack, network switch, patch panel, uninterruptible power supply (UPS), and necessary cabling, the total investment for the initial setup came to approximately $500.
- Server Model: Dell PowerEdge R720
- Processors: Dual Intel Xeon E5-2640 @ 2.50 GHz
- Memory: 128 GB DDR4-1333 MHz
- Power: Dual 750 W Power Supplies
- Initial Server Cost: $162
- Total Setup Investment (with storage, rack, switch, patch panel, UPS, cabling): ≈ $500
Virtualization Operating System
Proxmox is an open-source virtualization platform built with Kernel-based Virtual Machine modules that allow the kernel to act as a hypervisor and Linux Containers for lightweight, resource-efficient workloads. Proxmox Virtual Environment, a web-based management interface that allows for easy use of all available functions, is included with the operating system. You can download the latest version from the Proxmox Downloads page.
Installation
Prerequisites
- Dell R720 server with PERC H710 RAID controller.
- 8 x 900GB SAS drives installed in the server.
- Access to the PERC H710 BIOS Configuration Utility or Dell iDRAC.
Initial Prep
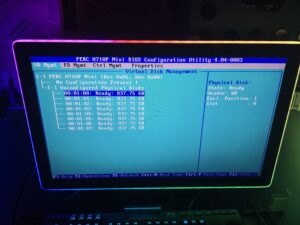
- Accessing the PERC H710 Configuration Utility
- Power on the Dell R720.
- During POST, press
Ctrl+Rwhen prompted to enter the PERC H710 BIOS Configuration Utility.
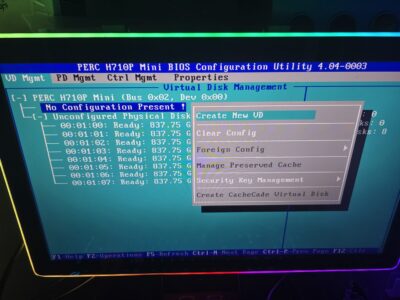
- Clear Existing Configurations (if any)
- In the Configuration Utility, select the PERC H710 controller.
- Press
F2for Operations, then select Clear Config to remove any existing RAID configurations. - Confirm the action to clear the configuration.
- Create a RAID 60 Virtual Disk
- In the main menu, select VD Mgmt (Virtual Disk Management).
- Press
F2, then select Create New VD.
- Set RAID Level to RAID 60.
- Select all 8 x 900GB SAS drives (use the spacebar to select each drive).
- Configure the following:
- Stripe Element Size: Default (typically 64KB).
- Read Policy: Read Ahead (recommended for performance).
- Write Policy: Write Back (ensure battery backup is functional).
- Span Count: For 8 drives, select 2 spans (4 drives per span, minimum for RAID 60).

- Press OK to create the virtual disk.

- Initialize the Virtual Disk
- Select the newly created RAID 60 virtual disk.
- Press
F2, then select Initialization > Fast Init. - Confirm to start initialization (this prepares the disk for use).
- Verify the Configuration
- Return to VD Mgmt and confirm the RAID 60 virtual disk is listed with:
- Status: Optimal.
- Capacity: Approximately 3.6TB usable (8 x 900GB with 2 spans, accounting for RAID 60 overhead).
- Ensure all 8 drives are assigned to the virtual disk.
- Return to VD Mgmt and confirm the RAID 60 virtual disk is listed with:
- Save and Exit
- Press
Escto exit the Configuration Utility. - Select Save Configuration and confirm.
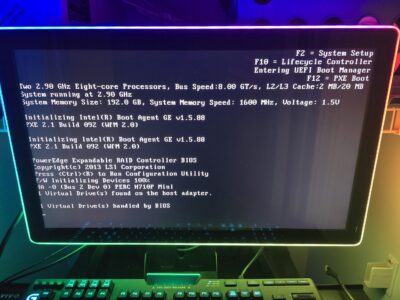
- Reboot the server to apply the changes, ensuring the virtual drive is recognized.
- Press
Notes
- RAID 60 combines striping (RAID 0) and mirroring (RAID 6), requiring a minimum of 8 drives (2 spans of 4 drives each).
- Total usable capacity is approximately 3.6TB (4 drives per span, with 2 drives per span used for parity).
- Ensure the PERC H710 firmware is up to date for optimal performance.
- Back up data before configuring RAID, as the process erases all data on the selected drives.
Installing Proxmox VE: Step-by-Step Guide
Prerequisites
- A USB drive (at least 8GB) for the bootable installer.
- Access to a computer with Rufus installed (for creating the bootable USB).
- Internet connection for downloading the Proxmox VE ISO.
Steps
- Download the Proxmox VE ISO
- Visit the Proxmox VE download page.
- Select the latest Proxmox VE ISO (e.g., Proxmox VE 9.x).
- Download the ISO file to your computer.
- Create a Bootable USB with Rufus
- Insert the USB drive into your computer.
- Download and install Rufus if it is not already installed.
- Open Rufus and select your USB drive under Device.
- Click Select and choose the downloaded Proxmox VE ISO file.
- Ensure the following settings:
- Partition scheme: GPT (preferred for UEFI systems).
- File system: FAT32.
- Boot selection: The selected Proxmox ISO.
- Click Start and confirm to format the USB drive.
- Wait for Rufus to create the bootable USB (this may take a few minutes).
- Boot from the USB Drive
- Insert the bootable USB into the target server or computer.
- Power on the system and enter the BIOS/UEFI (usually by pressing
F2,Del, orF12during boot). - Ensure UEFI boot mode is enabled in the BIOS/UEFI settings.
- Set the USB drive as the first boot device.
- Save changes and reboot.
- Select Install Proxmox VE from the Proxmox boot menu.
- Install Proxmox VE
- The Proxmox VE installer will load. Press Next to begin.
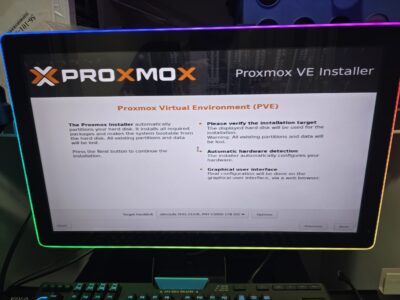
- Accept the EULA and click Next.
- Select the target disk for installation (e.g., the RAID 60 array from your Dell R720 setup, if applicable).
- Configure the following:
- Country, Time Zone, and Keyboard Layout: Set as needed.
- Password: Set a strong root password.
- Email: Enter an admin email for notifications.
- Network Configuration:
- Select a network interface (e.g.,
eth0). - Set a static IP address (e.g.,
192.168.1.100), subnet mask (e.g.,255.255.255.0), gateway, and DNS server.
- Select a network interface (e.g.,
- Review the summary and click Install.
- Wait for the installation to complete (this may take a few minutes).
- The Proxmox VE installer will load. Press Next to begin.
- Basic Initial Configuration
- Remove the USB drive and reboot the system.
- After reboot, the system will display the Proxmox VE console with the IP address (e.g.,
https://192.168.1.100:8006). - From another computer on the same network, open a web browser and navigate to the displayed URL (e.g.,
https://192.168.1.100:8006). - Log in using:
- Username:
root - Password: The password set during installation.
- Realm: Linux PAM standard authentication.
- Username:
- Verify the web UI loads and displays the Proxmox VE dashboard.
Notes
- Use a static IP address for reliable access to the web UI (SSL certificates and DNS will be configured in a later portion).
- The web UI uses a self-signed SSL certificate; you may need to accept a security warning in your browser.
- Back up any data on the target disk before installation, as it will be erased.
- After installation, update Proxmox VE via the web UI or CLI using
apt update && apt full-upgrade. - GPT is preferred for modern systems with UEFI; ensure your system supports UEFI boot for GPT compatibility.
Optional Install: Non-Raid controlled SSD
Prerequisites
-
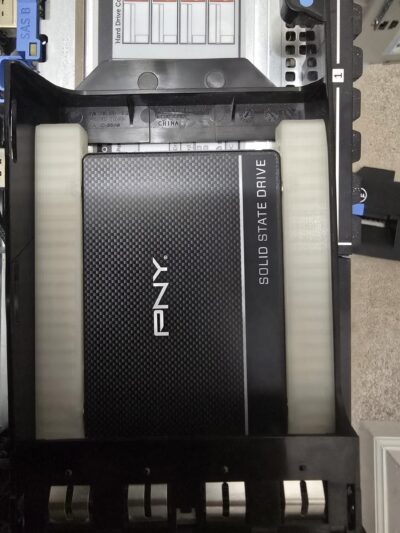
- 1TB 2.5-inch SATA SSD.
- SATA cable (Seagate recommends <1 meter length for reliability).
- 3D printer and PLA filament for printing the 2.5″ to 3.5″ HDD/SSD adapter.
- Proxmox VE ISO on a bootable USB (created with Rufus, GPT preferred, as per previous guide).
- Tools: Screwdriver, antistatic wrist strap (optional).
Steps
-
- 3D Print the Drive Adapter
- Download the STL file for the 2.5″ to 3.5″ HDD/SSD adapter from Thingiverse.
- Use a 3D printer with PLA filament to print the adapter. Recommended settings:
- Layer height: 0.2mm for a balance of speed and quality.
- Infill: 20-30% for durability.
- Supports: Not required (per adapter design).
- Verify the printed adapter fits the Dell R720’s 3.5-inch drive tray screw holes.
- Secure the 2.5-inch SSD into the adapter using the provided screw holes (use 2.5-inch SSD mounting screws, typically M3).
- Install the SATA SSD
- Power off the Dell R720 and unplug it from power.
- Open the server chassis (remove the top cover per Dell R720 manual).
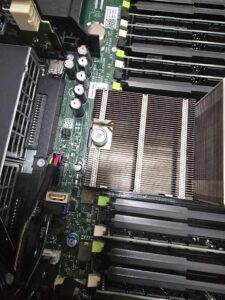
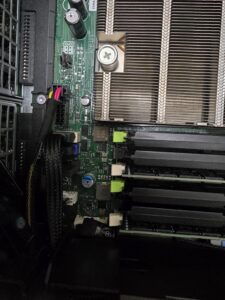
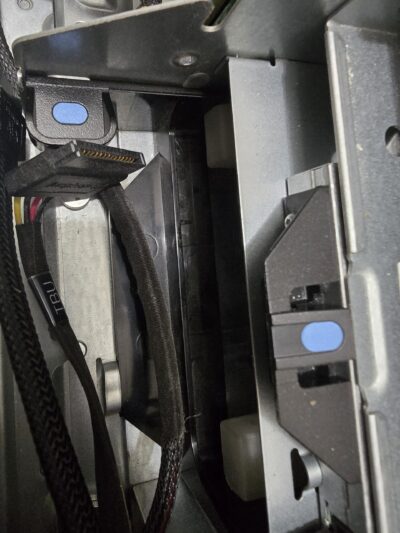
- Locate the front control panel assembly and remove the cage. This cage’s purpose is to allow air to pass through the server.
- Connect a SATA cable from the SSD to an available SATA port 1 next to the disk drive SATA connector behind the CPU on the motherboard backplane.
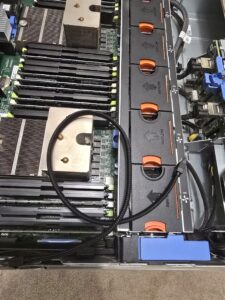
- Insert the SSD (with the 3D-printed adapter) into the removed cage, sanding the adapters to ensure a snug and smooth fit.

- Reinstall the cage and attach the power connector included in the DVD drive harness assembly and the SATA cable.

- Close the chassis and reconnect power.
- Configure BIOS Settings for Drive Recognition
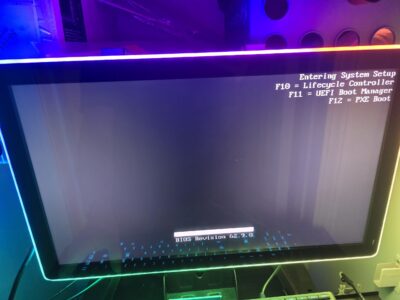
- Power on the R720 and press
F2during POST to enter the System Setup (BIOS).
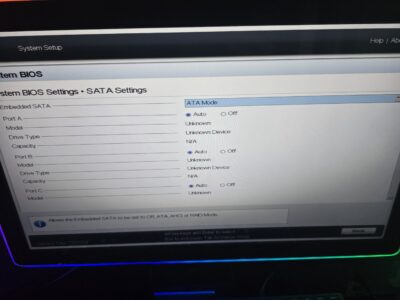
- Navigate to System BIOS > SATA Settings.
- Set the SATA mode to ATA (instead of AHCI) to ensure the SSD is recognized during OS installation. ATA mode is required for some older controllers to detect SATA drives initially.

- Ensure Boot Mode is set to UEFI (for GPT partition compatibility, as per your preference).
- Save changes (press
F10) and exit.
- Power on the R720 and press
- Verify SSD Detection
- Enter the PERC H710 Configuration Utility by pressing
Ctrl+Rduring POST. - Check PD Mgmt (Physical Disk Management) to confirm the 1TB SSD is listed and in a “Ready” state.
- If the SSD is not detected:
- Recheck SATA and power connections.
- Replace the SATA cable if damaged (ensure <1 meter length).
- Try another SATA port or test the SSD in another system.
- Exit the utility (
Esc) without creating a RAID array, as the SSD is for standalone OS use.
- Enter the PERC H710 Configuration Utility by pressing
- Install Proxmox VE on the SSD
- Insert the Proxmox VE bootable USB (created with Rufus, GPT preferred, as per the previous guide).
- Boot from the USB by setting it as the first boot device in BIOS (
F11for Boot Menu). - Select Install Proxmox VE from the boot menu.
- In the installer, select the 1TB SSD as the target disk.
- Configure as per the previous guide:
- Country, Time Zone, Keyboard: Set as needed.
- Password: Set a strong root password.
- Email: Enter an admin email.
- Network: Set a static IP (e.g.,
192.168.1.100/24), gateway, and DNS.
- Complete the installation and reboot, removing the USB.
- 3D Print the Drive Adapter
Congratulations
Now that you’ve got a powerful virtualization platform ready, you’re all set to spin up VMs, containers, and more. In the upcoming blogs of this series, we’ll dive deeper into expanding your Proxmox VE homelab with detailed guides on setting up essential services and virtual machines. Expect step-by-step tutorials, including how to configure a Pi-hole container for network-wide ad blocking and a Kali Linux VM for security testing, as well as other exciting projects to enhance your homelab’s capabilities. Stay tuned for practical, hands-on instructions to make the most of your powerful virtualization setup!