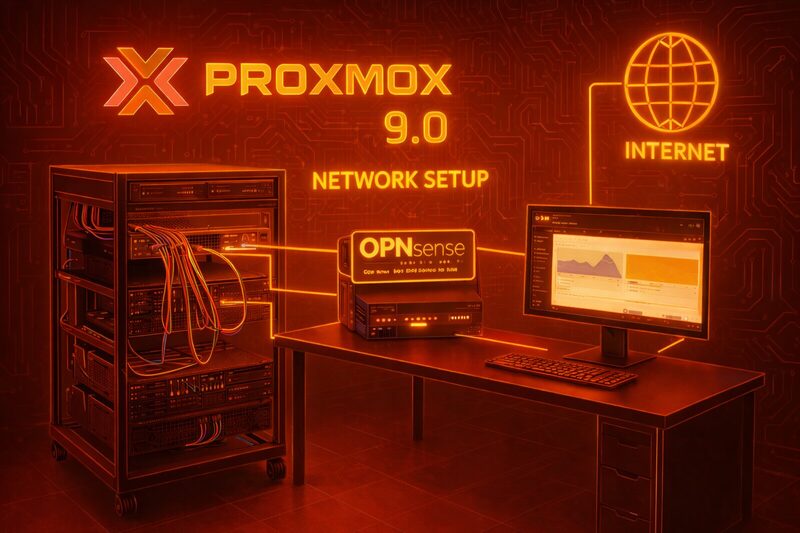
In Post 1, we installed Proxmox VE on a refurbished Dell PowerEdge R720 and created a capable, cost-effective virtualization platform. This post gives that platform a proper network architecture — four isolated bridges with OPNsense as the edge firewall.
A flat home network, everything on the same subnet, routed through a consumer router, is fine for basic lab work. But it’s not fine for security testing. When you’re running intentionally vulnerable systems, attack tools, or internet-facing services, isolation matters. This post builds four discrete network zones, each with a defined purpose and enforced boundaries, using only open source software.
By the end of this post, the lab will have a real edge firewall between the internal lab network and the internet, an isolated DMZ ready for future internet-facing services, and management access cleanly separated from lab traffic. Every step has a corresponding script in the homelab-series repository.
Clone the repo to your Proxmox host before starting:
Why Network Segmentation
The Four Network Zones
Before touching any configuration, it helps to understand what we’re building and why each zone exists.
Management (vmbr0, 192.168.1.0/24)
This bridge is created by the Proxmox installer and is not modified here. It carries admin access to the Proxmox host only, no lab VM traffic passes through it. Critically, OPNsense never gets an interface on this network. If the firewall VM crashes or behaves unexpectedly, management access to the host is always available on this bridge.
Edge/WAN (vmbr1, DHCP from home router)
A pure Layer 2 passthrough bridge. OPNsense is the only tenant. It receives a DHCP lease from the home router and uses it as the upstream internet connection. Importantly, no IP address is assigned to the Proxmox host on this bridge.
Internal (vmbr2, 10.10.10.0/24)
The private lab network. Pi-hole, the Samba Domain Controller, the Kali Linux VM, and all future lab systems live here. OPNsense’s LAN interface is the gateway at 10.10.10.1. As a result, internet access is permitted outbound through OPNsense. However, access to the DMZ is blocked at the firewall.
DMZ (vmbr3, 10.20.20.0/24)
Isolated from Internal at the firewall. Specifically, reserved for future internet-facing services. Hard-blocked from reaching the Internal network or Management at the firewall level. Importantly, built now so the full architecture is in place from day one.

Network topology, four isolated zones with OPNsense as the edge firewall.
Network and IP Reference
| Bridge | NIC | Role | Subnet | Gateway |
|---|---|---|---|---|
| vmbr0 | eno1 | Management | 192.168.1.0/24 | Home router |
| vmbr1 | eno2 | Edge (WAN) | Home router DHCP | Home router |
| vmbr2 | eno3 | Internal (LAN) | 10.10.10.0/24 | OPNsense 10.10.10.1 |
| vmbr3 | eno4 | DMZ | 10.20.20.0/24 | OPNsense 10.20.20.1 |
OPNsense VM NIC assignments:
| VM Interface | Bridge | Role |
|---|---|---|
| vtnet0 | vmbr1 | WAN |
| vtnet1 | vmbr2 | Internal |
| vtnet2 | vmbr3 | DMZ |
Key design rule: OPNsense does not get an interface on vmbr0. The Proxmox host must never be reachable through the firewall VM.
Identify Your Physical NICs
SSH into the Proxmox host and confirm all four NICs are present and cabled before creating bridges.
1. List all interfaces and confirm link status:
2. Check speed and link detection per interface to confirm all four NICs are connected:
3. Confirm which NIC is currently carrying the Proxmox management IP, this is your vmbr0 NIC and must not be reassigned:

ip link show — all four NICs visible and UP
Note: Interface names on your system may differ (eth0–eth3, enp3s0f0, etc.). Substitute the correct names wherever eno1–eno4 appear in the scripts and config files. The scripts detect the management NIC automatically and will warn if you attempt to reassign it.
Create the Network Bridges
This script creates vmbr1, vmbr2, and vmbr3 by appending bridge stanzas to /etc/network/interfaces and applying them with ifreload -a. It backs up the interfaces file before making any changes and validates that the requested NICs exist and are not the management interface.
1. Pull the latest scripts from the repo:
2. Review the script before running it:
3. Run the bridge creation script:

01-create-bridges.sh running, prompting for NIC assignments before applying changes
The script prompts for the physical NIC names for each bridge (defaulting to eno2, eno3, eno4) and displays a confirmation summary before applying any changes. Full script:
4. Verify all four bridges are active:

brctl show — all four bridges active with NICs assigned

Proxmox Network panel (Node → System → Network) confirming all four bridges
Deploy the OPNsense VM
With bridges in place, the next step is creating the OPNsense VM. Download the OPNsense CE installer ISO to the Proxmox ISO store first:
Why OPNsense over pfSense? pfSense’s parent company Netgate has increasingly pushed users toward paid subscriptions and commercial hardware. OPNsense is a fully community-driven fork built on HardenedBSD with weekly releases and no subscription model. It is the recommended open source edge firewall for a homelab in 2025.
Run the VM creation script, it auto-discovers available ISOs and storage pools:

02-create-opnsense-vm.sh running, interactive ISO and storage selection
Full script (see 02-create-opnsense-vm.sh on GitHub for the latest version):
Verify the VM was created:

Proxmox VM list showing the OPNsense edge VM

VM hardware summary — net0 vmbr1 (WAN), net1 vmbr2 (Internal), net2 vmbr3 (DMZ)
Install OPNsense via Console
The ISO installer and first-boot interface assignment must be done through the Proxmox noVNC console. Everything after this point is scripted.
1. Start the VM and open the console:
Navigate to the Proxmox web UI → VM 100 → Console.
- The OPNsense boot menu appears. Select Install OPNsense.
- Log in with the default installer credentials:
installer/opnsense - Select Install (UFS) → accept the disk selection → confirm.
- Set a strong root password when prompted.
- Select Reboot when the install completes.
Lessons learned: Auto (UFS) failure on a blank disk
On a disk with no existing partition table, the OPNsense installer’s “Auto (UFS)” option will fail at the partitioning step. The fix: select “Manual” partitioning, choose the disk, create a GPT partition table (g), write it (w), then exit back to the installer menu and select “Auto (UFS)” again. It will succeed on the now-initialized disk.

Auto (UFS) fails on a disk with no partition table

Step 1: Select Manual partitioning and choose the disk

Step 2: After GPT is written, return to the installer menu

Step 3: Create the GPT partition table (g to create, w to write)

Step 4: Auto (UFS) now succeeds on the initialized disk
Before the VM reboots, remove the ISO so it boots from disk on the next start:
Alternatively, remove the ISO via the Proxmox web UI: VM → Hardware → CD/DVD Drive → Edit → Do not use any media.

Remove the ISO via Proxmox Hardware → CD/DVD Drive → Edit → Do not use any media
On first boot, at the console menu
Select 1) Assign Interfaces:
- Decline VLAN setup when prompted (
N) - WAN →
vtnet0 - LAN →
vtnet1 - Optional 1 →
vtnet2 - Confirm the assignment
Select 2) Set Interface IP Address → choose LAN:
- IP:
10.10.10.1/ Subnet:24 - Upstream gateway: leave blank for LAN
- Enable DHCP server on LAN: (
N) (Pi-hole handles DHCP in the next post) - Revert to HTTP: (
N)

OPNsense first-boot interface assignment — vtnet0 → WAN, vtnet1 → LAN, vtnet2 → OPT1

Setting the LAN IP to 10.10.10.1/24 at the OPNsense console

All interfaces confirmed — LAN 10.10.10.1/24, OPT1 (DMZ) 10.20.20.1/24, WAN on DHCP
Configure OPNsense via API
With OPNsense installed and the LAN IP set, the API configuration script handles the rest. It runs in two phases: Phase 0 creates a persistent internal admin LXC on vmbr2, and Phase 1 configures OPNsense via the REST API to enable the DMZ interface and create three baseline firewall rules.
Before running the script, enable the OPNsense API. Access the web UI from the Proxmox host using an SSH tunnel:
Then open https://localhost:8443 in a browser. Complete the setup wizard, then:

OPNsense web GUI login page, accessed via SSH tunnel from the management network
- Enable API: System → Settings → Administration → Enable API → Save.
- Generate API key: System → Access → Users → admin → API Keys → Add. Copy the key and secret, shown only once.

System → Access → Users → admin → API Keys — create and download the key before running the script
Run the configuration script:
The script configures:
- OPT1 (DMZ) interface enabled and labeled “DMZ”
- Firewall rule: Internal → WAN (allow)
- Firewall rule: Internal → DMZ (block)
- Firewall rule: DMZ → Internal (block)
Full script available at 03-opnsense-configure.sh on GitHub.

Script 03 Phase 0 — creating the admin-internal LXC (CT 110) on the Internal network

Script 03 Phase 1 — OPNsense API configuration complete, all three firewall rules created

OPNsense Firewall → Rules — all three baseline rules active across LAN and OPT1 interfaces
Verify Network Connectivity
Spin up a quick test LXC on the Internal network to verify the full network stack is working end-to-end.
Proxmox storage note: Proxmox uses two separate storages for LXC creation. The template (local:vztmpl/...) must come from a directory-based storage like local. Additionally, the container root filesystem (--rootfs) must go to a block or directory storage that supports rootdir content — typically your LVM or ZFS pool, not local. Run pvesm status --content rootdir to find valid rootfs storage names on your node.

Test container (CT 998) created on the Internal network at 10.10.10.51

LAN gateway (10.10.10.1) and internet (1.1.1.1) both reachable from the Internal network

DNS tools installing inside the container, confirming internet routing and package repo access

External DNS resolution working — google.com resolves via 1.1.1.1 through OPNsense

OPNsense DMZ interface responds (expected) — forwarded traffic to 10.20.20.100 blocked or no host
Congratulations
The lab now has four isolated network zones with a real open source firewall between them. Management is completely separated from lab traffic. The DMZ is live and waiting for future internet-facing services. OPNsense is handling all routing and enforcement.
Every step in this post has a corresponding script in the homelab-series repository, clone it, customize the variables for your environment, and run.
In the next post, we give the lab a real identity: a registered domain, browser-trusted SSL certificates on every service via Let’s Encrypt, a Pi-hole DNS resolver with local hostname records, and a full Active Directory domain with Samba 4, for approximately $10 per year.
Resources
| Resource | Link |
|---|---|
| OPNsense CE Downloads | opnsense.org/download |
| OPNsense API Documentation | docs.opnsense.org |
| Proxmox Linux Bridge Docs | pve.proxmox.com/wiki/Network_Configuration |
| homelab-series Repository | github.com/AbrictoSecurity/homelab-series |